When it comes to durable and visually appealing flooring solutions, epoxy flooring is hard to beat. With its seamless, glossy finish and exceptional strength, epoxy flooring has gained popularity in various residential, commercial, and industrial settings. However, to ensure its longevity and performance, proper installation is crucial. In this comprehensive guide, we will walk you through the process of epoxy flooring installation, from understanding the basics to the final touches.
Pre-Installation Preparation
1. Assessing the Suitability of the Substrate: Before installing epoxy flooring, it is essential to evaluate the suitability of the substrate. The surface should be structurally sound, free of cracks, and capable of supporting the weight of the epoxy coating. If there are any issues, such as moisture or unevenness, they should be addressed beforehand.
2. Surface Preparation Techniques: Proper surface preparation is vital for ensuring the adhesion and longevity of the epoxy flooring. This involves thorough cleaning to remove dirt, grease, and existing coatings. Additionally, any cracks or damaged areas should be repaired, and the surface should be properly primed to enhance adhesion.
3. Moisture Testing and Mitigation: Excess moisture can compromise the performance of epoxy flooring. Conducting a moisture test is crucial to identify any underlying moisture issues. If high moisture levels are detected, appropriate mitigation measures, such as moisture barriers or moisture-resistant primers, should be employed.
Tools and Materials Required
1. Essential Tools for Epoxy Flooring Installation: To ensure a successful installation, you will need a range of tools, including a floor grinder or shot blaster, mixing equipment, squeegees, rollers, and brushes. These tools will help you prepare the surface, mix and apply the epoxy, and achieve a smooth finish.
2. High-Quality Materials and Their Specifications: Using high-quality materials is essential for achieving a durable and visually appealing epoxy floor. This includes epoxy resin, hardening agents, primers, topcoats, and sealants. Always follow the manufacturer’s specifications and recommendations for the materials to ensure proper application and performance.
3. Safety Equipment and Precautions: Epoxy flooring installation involves working with chemicals and can generate fumes. It is crucial to prioritize safety by wearing appropriate personal protective equipment, such as gloves, goggles, and respirators. Adequate ventilation should also be maintained during the installation process.
Step-by-Step Installation Process
1. Priming the Surface: Applying a primer to the prepared substrate helps enhance adhesion and prevents air bubbles. The primer creates a bond between the substrate and the epoxy coating, ensuring a solid foundation for the flooring system.
2. Mixing and Applying the Epoxy Coating: Follow the manufacturer’s instructions to mix the epoxy resin and the hardening agent accurately. Improper mixing can result in poor curing and affect the performance of the epoxy floor. Once mixed, use a squeegee or roller to evenly apply the epoxy coating on the surface.
3. Spreading the Epoxy Evenly: After applying the initial coat, spread the epoxy evenly using a roller or squeegee. This step helps achieve a uniform thickness and ensures a smooth finish. Pay attention to any edges or corners to ensure complete coverage.
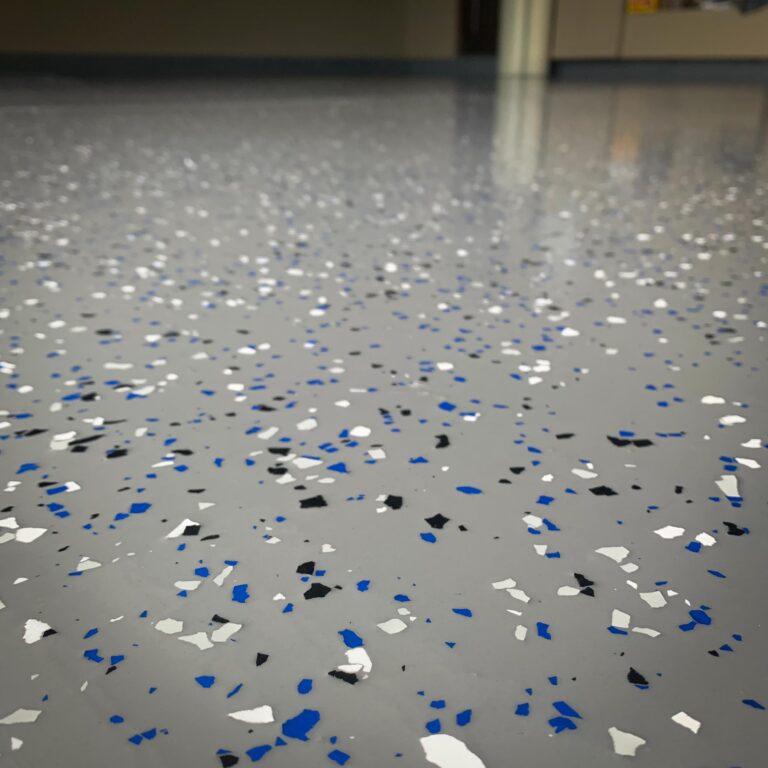
4. Adding Decorative Elements (Optional): If desired, decorative elements such as flakes, metallic pigments, or quartz crystals can be added to enhance the aesthetics of the floor. These elements are applied while the epoxy is still wet, and they add texture and visual interest to the surface.
5. Applying Topcoats and Sealants: To enhance the durability and longevity of the epoxy flooring, topcoats and sealants are applied. These protective layers provide additional chemical resistance, UV protection, and a glossy finish. Follow the manufacturer’s guidelines regarding the number of topcoats required and the recommended drying time between coats.
Curing and Drying Time
1. Understanding the Curing Process: The curing process refers to the chemical reaction that occurs between the epoxy resin and the hardening agent, resulting in the formation of a solid and durable surface. It is important to allow sufficient curing time to ensure the epoxy flooring reaches its maximum strength and performance.
2. Factors Affecting Drying Time: Several factors can influence the drying time of epoxy flooring, such as temperature, humidity, and the type of epoxy system used. Higher temperatures generally accelerate the drying process, while lower temperatures and high humidity can extend the drying time.
3. Tips for Optimal Curing and Drying: To achieve optimal curing and drying, maintain the recommended temperature and humidity levels during the installation and curing period. Avoid heavy foot traffic or placing heavy objects on the floor until it has fully cured. Follow the manufacturer’s guidelines for post-installation care and maintenance.
Epoxy flooring installation requires careful preparation, attention to detail, and the use of quality materials. By following the steps outlined in this comprehensive guide, you can achieve a beautiful, durable, and long-lasting epoxy floor. Whether you’re looking to transform your garage, upgrade your commercial space, or enhance your residential interiors, epoxy concrete floor coverings provides an excellent solution that combines aesthetics and functionality. Take the time to understand the process, consult professionals when needed, and enjoy the benefits of a stunning epoxy floor for years to come.